How to Create a Visual Schedule

Things You’ll Need:
— Pencil
— Computer
— Clip art or photos
— Printer
— Contact paper
Instructions:
1.) Determine which part of the day your schedule will address. When deciding to create a picture schedule for your child with autism, you will want to determine which part of the day to focus on. You will likely end up with several different picture schedules. Some examples of commonly used picture schedules include a before-school routine, after-school routine, a schedule for therapy days and a separate schedule for non-school days.
2.) Draft a routine. Once you have decided which routine you will focus on first, write down the routine on paper first. Try to think of every small step that may be included in the slot of time you are focusing on. For example, in a before-school routine, some items that may be included are wake up, make the bed, use the restroom, eat breakfast, get dressed (breaking this down by step may be necessary), brush teeth, brush hair, get lunch, get backpack and go to school.
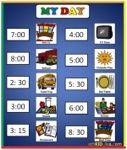
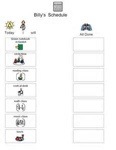
3.) Create a computer print out. After you have written down your routine, open up your word processing software program and create a two-column table. In the left-hand side you will be placing a clip art image that correlates to the step and on the right side you will detail the step in text. For example you can insert a picture of a toilet in the left column and in the right column write “time to use the bathroom.”
4.) After printing the picture schedule out, put the contact paper over the photo or clip art.You can then post the picture schedule up in a logical and easy-to-see place, like on the refrigerator.
* If your child is school-aged, consider asking his teacher about the classroom routines so that you can incorporate some of these into the non-school days. Depending on the age of your child, you may want to get his input on the picture schedule since this will be used mostly by him.